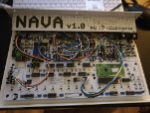
Discuss Nava construction and related issues
-
-
- Posts 268
- Joined: Jan 26th, '16, 21:30
Does anyone have any decent photos of how they attached the (RED) LCD?
The red (Ebay) LCD is around 9mm thick from the LCD PCB.
I have Kacper's case (Batch 1)
What side they mounted it?
Do you use screws and rubber/nylon washers?
What side do you mount the headers?
The reason I ask is after playing around with the Case, PCB and LCD; the way the build guide suggests leaves a huge gap between the LCD and Case.
Advice and photos would be appreciated!

Last edited by
hofmann25 on Mar 7th, '17, 05:12, edited 1 time in total.
-
- Posts 68
- Joined: Jun 21st, '16, 10:33
I don't know yet, but from reading through the forum the LCD apparently fits nicely soldered on the component side of the Erica Synths Case. Happymums case apparently solder on the topside(knobs). I think you just mount it with just the header pins and nothing additional... Not sure though...
From Aarrgghh, (who mounted LCD on component side with Erica Synths case). "The display is mounted as close as possible to the pcb, and with the erica case and plexi there is about .5 mm between the display and the plexi. It's a very nice fit!"
From the build guide photos - LCD goes on long side of pins.. Unsure if this differs if you mount on top side of the PCB... I assume the pins are not longer than the LCD screen so you might just have to play around with that.
Though I have a question myself if you don't mind me piggybacking off your post. (I'm waiting on header pins in the mail, should be here tomorrow.)
Do you just use the header pins AS IS, or do you break off the plastic and take out the pins and install them separate? The build guide says "We use pins from a pin header", almost implying that you take out the pins from the plastic, and I can't tell from the build guide photos. I almost definitely don't think this is the case but I'm level 30 noob at electronics/DIY and I'm questioning myself constantly in fear I will fuck something up....
Anyway I'm gonna give it a go tomorrow when my header pins come in, I'll post some pics..
-
- Posts 268
- Joined: Jan 26th, '16, 21:30
Thanks...
Does anyone have photos or advice?
-
- Posts 36
- Joined: Feb 6th, '17, 09:14
I'm using the Erica enclosure. It's mounted as close the the pcb as possible and with my enclosure it's a very tight (perfect) fit between the lcd and the plexi (0.5-1.0mm). Not the best pictures for showing it, but maybe it will help anyway!

One tip could be that you solder ONE pin on the display so you are able to adjust it up and down. Then try it out with your case to find the best height before you solder the rest of the pins.